Open top menu
Showing posts with label Andriod. Show all posts
Sunday, 25 October 2015
no image

This method is possible with an awesome app named SMS Bypass. This app allows you to set a particular recovery message before and this message will get store in the app and whenever you send a text message with that secret code method your pin or password will be bypass and you can access your android. Implement this method using the steps discussed below.

Requirements:-

  • Rooted Android
  • Android 4.0 or above.

Steps To Set SMS Bypass Lock App :-

  1. First of all download and install the app Sms Bypass in your android.
  2. Now open the app and give it the permanent superuser(root) access to it and .
  3. The default secret code is 1234 in this app you can change it according yo your wisk like 1111.
    Sms Bypass Unlock Screen1
    Sms Bypass Unlock Screen
  4. Send the Secret code from the other phone with following format secret-code reset, for example : 1111 reset.
    Sms Bypass Unlock Screen2
    Sms Bypass Unlock Screen
  5. Now enable the remote passwoed there.
    Sms Bypass Unlock Screen1
    Sms Bypass Unlock Screen1
  6. Thats it your screen security will get bypassed by this method and you can access your android.
Also Read-

Read more
Wednesday, 21 October 2015
no image


Best Features That You Will Get In Android 6.0 Marshmallow
Almost all android devices will be receiving this update and read out the all new features that will be there in your android after installing Android 6.0 on your android.

#1 Android Pay

Android pay will be a very cool feature like samsung pay where user will have an extra security while making payments from your android device. The extra security you will get by having fingerprint security in this app that will make you to pay securely from your android device.android pay


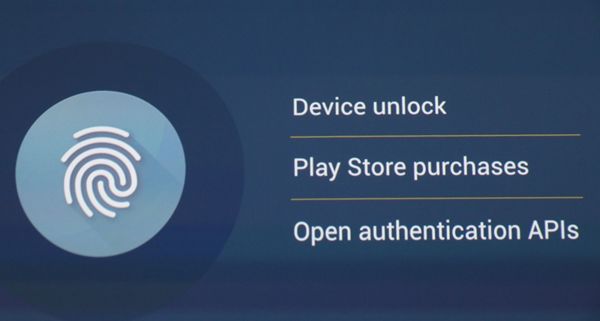
#2 Fingerprint Built In Feature

In android 6.0 you will get built in fingerprint feature in your android and with that you can easily secure your android prom any unauthorized access. And also fingerprint login is better than any password and pin login.fingerprint built in feature android m


#3 App permissions

In android 6.0 there is better app permissions that will provide you better protection from the unauthorized apps in your android. Using permission manager you can easily provides the access of only specific things to the specific apps. And your data will be always be secure with you in your android device.app permissions android m


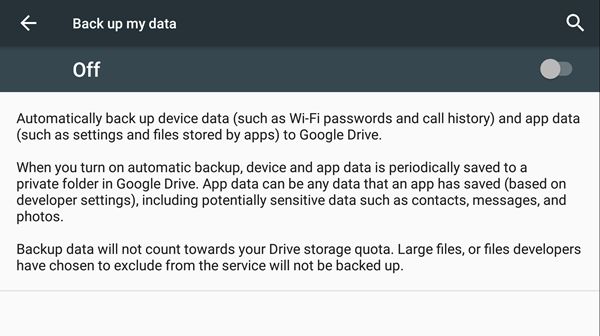
#4  Auto app data backup

In previous versions of android app data was automatically get cleared when the app got uninstall or device treated to reset. But in android 6.0 there is a auto app data backup feature that will hold all your app data in your android and can be revert back when you install the app back.auto app data backup


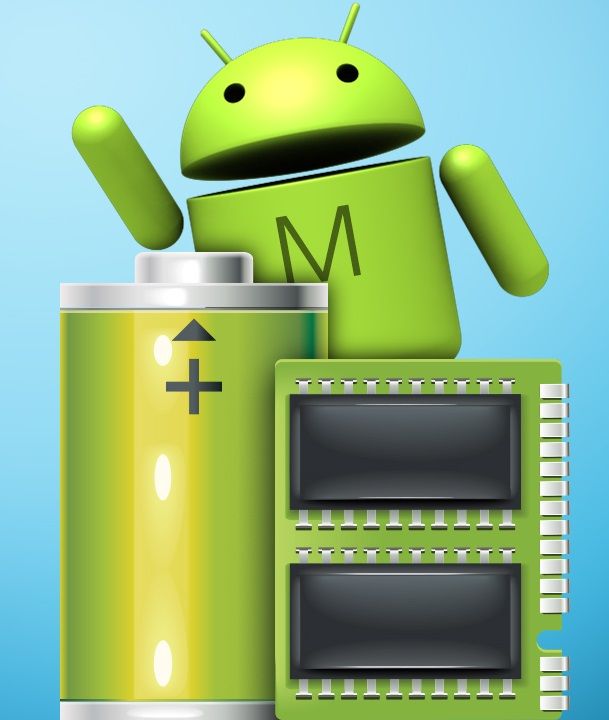
#5 Android Marshmallow RAM manager

There is built in RAM manager in this version of android, by using it you can easily manage the RAM usage in your android device easily. And you will not need to install any third party RAM manager in your android as official one from google will be there in your device.android marshmallow ram manager


#6 Better Battery And Power Managing

The main thing that is focused in this version of your android is the better battery and power consumption as in the previous versions there were battery bug but hopefully in this version those all will get fix.android m better battery


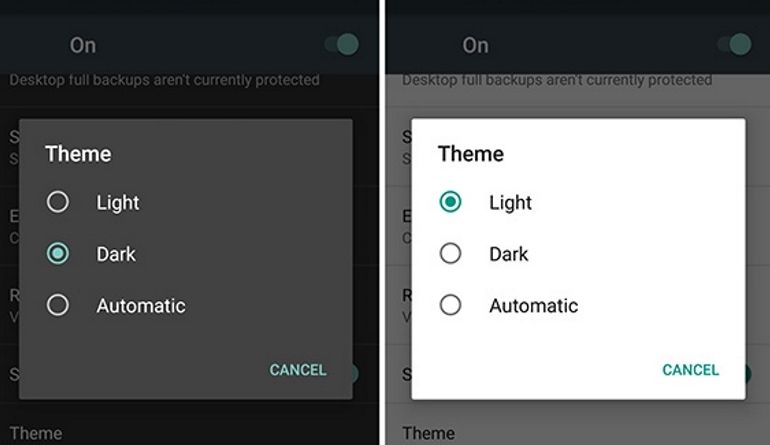
#7 Android Marshmallow dark theme

Talking about the looks in android 6.0 you will be having feature like dark theme that will let you to have better experience of using your android better at night using this theme and this will also protect your android from the bright white light of screen.android marshmallow dark theme


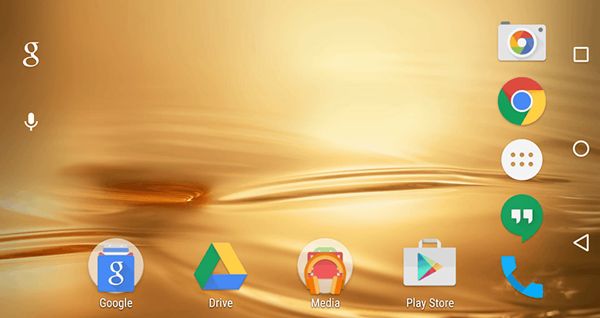
#8 Rotating home screen

Time to experience something new with this feature that is not currently in any previosu version of your android. Using this feature now you can even rotate your home screen by tilting your android.android m landscape


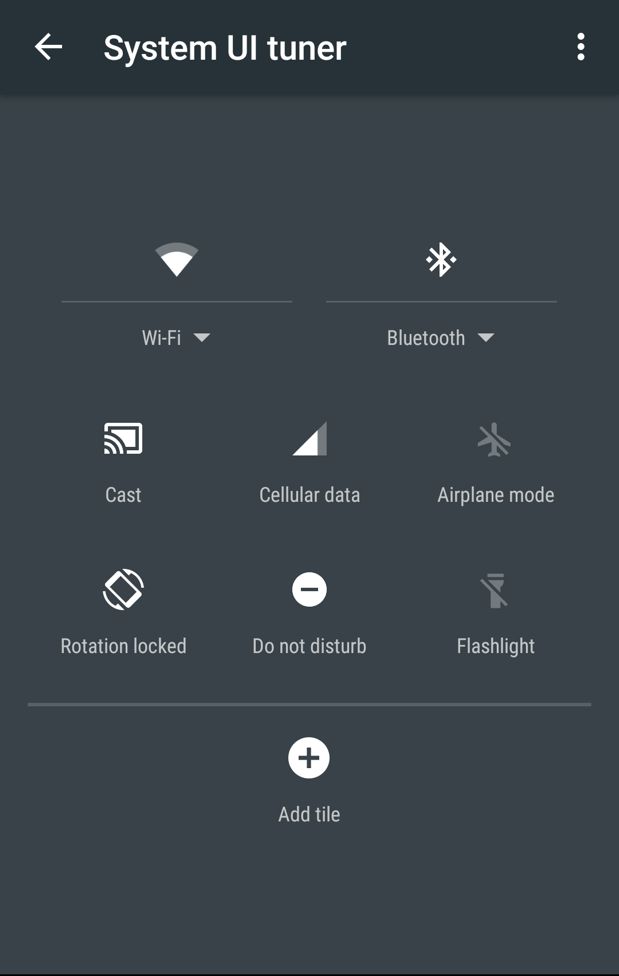
#9 Easy Customizable Status Bar

In android marshmallow you can complete customize your status bar according to your wish. You can turn apps there on and off according to your need in your device.android m status bar


#10 Better File Manager

Google has designed a special file manager for this version of android that is user friendly and easy to maintain all the files stored in your android storage.
android m file manager

Also Read-

Read more
Monday, 19 October 2015
no image

There is no mystery about the fact that Galaxy S6 Edge comes with a very nice pair of earbuds which is definitely among the best ones that I’ve owned up to this moment. I say that as long as they are quite comfortable, they are capable to offer a robust sound, but you know that there is always space for improvement.

Do you also tend to think that they could use just a little boost in volume? If you are one of those owners who have a strange feeling that their Galaxy S6 Edge doesn’t seem to be quite loud enough when you have a set of headphones connected, you’re in luck today.
To be more precise, should know all about a flashable ZIP from developer kajkac will boost the headphone volume by 10%. All you need is a rooted Galaxy S6 Edge, the latest custom recovery installed and patience to make a full backup; if something bad happens or if you don’t like the changes, then be sure that the easiest way to get things back to normal would be to restore the backup, so take your time to take care of this aspect!
Learn:

Now, you are ready to apply the steps from below:

How to Improve Galaxy S6 Edge Headphone Sound (method 1):

  1. Take the flashable ZIP from here;
  2. Now, it’s time to boot your phone into custom recovery mode. So, press and hold the volume up, home, and power buttons simultaneously. When the boot logo comes up, you can release the buttons;
  3. Then, you have to tap the “Install” button;
  4. From here, go to the Download folder;
  5. It’s time to choose the “S6_Volume_Boost_Headphone.zip” file;
  6. Now, swipe the slider at the bottom of the screen to install the mode;
  7. At the end, just reboot the device.
  8. Your headphone volume will have been boosted by about 10%, but this is not the only procedure that I recommend!

How to Improve Galaxy S6 Edge Headphone Sound (method 2):

  1. Find a quiet environment and plug the earphones into your S6 Edge;
  2. Then, enter into Settings;
  3. Go to the Sounds and notifications section;
  4. From there, access Sound quality and effects;
  5. Go to Adapt Sound;
  6. When you turn it on you’ll be prompted to run through various tests that should tailor the sound on your device;
  7. If you don’t believe me, all you have to do is to tap to listen to the original sound and your personalized version to hear the difference;
  8. Back in the Sound quality and effects menu, you can also find SoundAlive+ for a surround effect, and TubeAmp, which simulates the sound from a tube amplifier. Use both of them if you feel so!
With these being said, I look forward to any comments and questions regarding this guide or the S6 Edge device. I am here to help you, so don’t hesitate to be honest and let me know when you are in need!
Read more
no image


Here we have a new advice for all new Samsung Galaxy S5 owners: just say the “Okay, Google” hot words and the magic will happen right out of the box in the new Touchwiz launcher. Yes, Google Now is an amazingly powerful service and we must admit that with its predictive cards and voice search, it can be just the help that you need in so many situations. So, do you know how to use Google Now Commands for your Samsung Galaxy S5?
Samsung has decided to build the “Okay, Google” detection right into the Galaxy S5’s stock launcher, but this is not enough. Just as usually, all you have to say are these two simple words any time you’re on your home screen and voice search immediately starts listening, but simple functions such as turning Wi-Fi or Bluetooth off without having to touch the screen are still not something that you can normally take advantage of.
If your Samsung Galaxy S5 is rooted, then you have some chances to change that, but if rooting is not an option, we have another solution for you. We are talking about developer Ryan Senanayake has managed to bring custom voice commands to non-rooted Galaxy S5 devices as well. All you have to do is to use Senanayake’s app which is available for free on Google Play and follow this step by step guide.

Set Up New Google Now Commands for your Galaxy S5 by using Commandr:

  1. Senanayake’s app known as Commandr can be found here. Download it by using the given link and then install it;
  2. When you first launch Commander, you will be greeted by a setup wizard; just as the screen says, swipe left in order to begin;
  3. On the next screen, Commandr presents that it uses an Android Accessibility service to intercept your voice commands; you have to tap Open Settings to enable this service;
  4. After that, you’ll be taken into a settings menu; look through the list of options and tap the one labeled Commandr for Google Now;
  5. On the next screen, toggle the switch at the top to On and press OK on the following pop-up;
  6. After that, you have to hit the Back button on your Samsung Galaxy S5 twice to head back to the Commandr setup wizard;
  7. From the Commandr setup wizard, you must swipe left to continue;
  8. On the following screen, choose what service you’d like to use as your note-taking app;
  9. After that, tap Done to complete the setup;
  10. Now you’ll be taken to Commandr’s main menu; here you’ll see that Enable interception is already ticked, since you enabled the Accessibility service during initial setup;
  11. If you want to customize your voice commands, you have to tap the Built-in Commands entry;
  12. This will take you to a list of all the pre-configured voice commands; feel free to toggle the switch to the right of a command to disable it;
  13. After doing that, you have the possibility to edit these commands to suit you: delete the voice commands that you don’t want or add a comma and then type in an extra voice command that will trigger the selected functionality; when you’re finished with your edits, you must simply tap Set;
  14. Now, you are ready to use your Custom Voice Commands.
As we have told you from the very beginning, from anywhere on your home screen, you can trigger a custom command. Say “Okay, Google” and then use one of your custom commands.
The default commands are the following ones:
  • Wi-Fi On – “Turn on WiFi”;
  • Wi-Fi Off – “Turn off WiFi”;
  • Flashlight On – “Turn on flashlight”, “Flashlight on” or “Torch”;
  • Flashlight Off – “Turn off flashlight” or “Flashlight off”;
  • Bluetooth On – “Turn on Bluetooth” or “Bluetooth on”;
  • Bluetooth Off – “Turn off Bluetooth” or “Bluetooth off”
  • Pause Music – simply say “Pause music”;
  • Resume Music – “Resume music”;
  • Next Song – “Next song”
  • Previous Song – “Previous song”;
  • Read Unread SMS – “Unread SMS” or “Unread texts”;
  • GPS On – it is not available on Android 4.2+ handsets;
  • GPS Off – is it not available either on Android 4.2+ phones.
Starting to this moment, you should not hesitate to take advantage of the voice activated benefits that you have just earned! We know that OK Google isn’t supported everywhere at this point, but if you’re in a country that does, there is nothing that stops you from using it on your Samsung Galaxy S5! Simply relax and enjoy it!
Read more
Sunday, 18 October 2015
no image

1. Disable App Notifications

Bugged by annoying app notifications that just keep coming? If you don’t know already, these app notifications also drain your phone’s battery. If you want to turn them off, and you are on Jelly Bean 4.1 and above, here’s how:
  1. On any of your unwanted notifications in your notification bar, long press on the notification for a message box to appear.
  2. Tap on App Info > Untick Show Notifications > OK.


2. Disable Mobile Data

Whenever you don’t need to stay connected, disabling the Mobile Data can help keep your smartphone battery from draining too quickly. Turning off mobile data is as easy as:
  1. Going to Settings > Data Usage.
  2. Disable Mobile data by toggling the setting from ON to OFF.


3. Set Mobile Data Limit

Want to keep track of how far your usage is from your monthly mobile data limit? If you have ICS and above, there is a feature which lets you keep track of how much of the quota you have left.
  1. Head over to Settings > Data Usage.
  2. Set your data limit by dragging the orange line to reflect your monthly quota.
  3. Set your data usage cycle based on when your "month" starts and ends, and you’re done.
You will be alerted once you hit the limit you have set. Note that the tracked data usage of your phone may vary slightly than your carrier’s tracking.


4. Add Multiple Google Accounts

You need a Google account to use an Android phone but did you know you can choose to run more than one Google account on your Android device. This is convenient if you use more than one account for several of your Google services. To add multiple Google accounts:
  1. Go to Settings > Add account.
  2. Select Google and setup your New or Existing Google account.
  3. Once added, choose what you want to sync with the account.
Repeat all the steps above if you want to add more accounts.


5. Disable automatic App Updates

Prefer to read through app permissions and manually pick which app updates to adopt? You can, but first you need to disable your automatic app updates. Here are the steps:
  1. Open Play Store and head over to Settings.
  2. Tap on Auto-update apps.
  3. Choose Do not auto-update apps.
If you want to enable the auto updates, follow the same path and choose Auto-update apps at any time or via Wi-Fi (available for certain Android devices only).


To update your apps manually, just open Play Store, and on the main page swipe in from the left and tap on My apps. You can tap on apps with pending updates and update them manually, or if you like to update them all at once, just tap on Update All.

6. How To Check For android System updates

For Android users that are using stock ROM, you may want to look for new updates to your system. To check for updates:
  1. Go to Settings > About phone/tablet.
  2. Tap on System updates.
  3. Tap Check now to look for system updates.

Check For android System updates


7. Changing Default Apps

If you have already set some default apps for particular tasks (e.g. using Chrome for opening web links) but wish to change this:
  1. Go to Settings > Apps.
  2. Swipe right and look for the All tab.
  3. Select the app you want to remove as default.
  4. Tap on Clear defaults.


8. Organize Homescreen Shortcuts With Folders

Once you have a lot of apps installed, your homescreen might be filled with app shortcuts. Unlike the app drawer, the apps on your home screen are not arranged alphabetically. So, you might want to create some folders for your homescreen shortcuts.
  1. Assuming you have more than a handful of shortcuts already on your homescreen, long press on any of the shortcuts and drag it onto another shortcut.
  2. A circle should now appear around the apps, indicating that a folder has been created.
  3. By tapping on the newly created folder, a mini window will pop up with your apps in it.
  4. You can drag and drop additional apps into the folder if you like. You can also rename the folder by tapping on the text area at the bottom of the mini window.


9. Disable Animations

Here’s a tip on how to make your Android device run a bit smoother: disable its animations. You will need to have access to Developer Options which can be found under Settings or About device.
Note: For some phones, you may need to go to Build number and tap on it repeatedly until you see "You are now a developer!". Developer options are now enabled.
Under enabled Developer options, look for Window animation scale, Transition animation scale, and Animator duration scale. Then, turn them off (disable) them one at a time.


10. How to Turn Off Auto-Correction

Hate the fact that your phone is going English teacher mode on you? Turn off auto-correction for peace of mind when texting.
  1. Go to Settings > Language & input.
  2. Tap on the settings icon next to the keyboard that you are using, e.g. Google Keyboard.
  3. Look for Auto-correction and tap on it.
  4. Select Off to turn auto-correction off.

Turn Off Auto-Correction
Read more
Tuesday, 8 September 2015
no image


The method is very simple and just need some simple steps following and you will creating a flashable zip of your favorite apps that you can use when your apps get deleted either through factory reset or while installing custom roms. So have a look on steps discussed below.

Steps To Create Recovery Flashable ZIP for Android Apps

1.First of all root your android device.
2.Now after rooting your must install custom recovery in your android.
3.Now download Recovery Flashable ZIP Template in your computer.
4.Extract this zip file in your desktop and open the folder where files being extracted..
5.There you will see two folders named “META-INF” and “system”.


1


6.Now open the System folder there.
7.Now in the system folder create a new folder and rename it to app.


2


8.Now copy the your favorite apk file from your computer and paste in this app folder.


3

9.Now move back to the root directory where you see  “META-INF” and “system” folders.
10.Press Ctrl+A of your keyboard and right click on folders and select Add to Archieve  and then select the target location to save your zip.


4
 
 
10.Thats it you are done, now your recovery flashable zip is ready that you can use to directly install all apps with a single flash.


So above is all about How to Create a Recovery Flashable ZIP for Android Apps. This is a very cool and easy method using which you can have all your apps installed on your android within seconds.
Read more